*This post may contain affiliate links. Please read the full disclosure here.
*This post contains affiliate links to products I use and trust. This means I might receive a small commission when you make a purchase using my links at no extra cost to you. So thank you!
 Ever wondered how bloggers hide their Pinterest images in a blog post? I have a step by step tutorial to show how you can do this too, on WordPress. (well its actually just one step!)
You may ask me these 2 questions,
- Why do I want to hide my Pinterest images?
- What good is it to my blog if I hide the images?
Ok, Let’s start with why hide them?
Almost everyone promotes their blog on Pinterest. So each blog post will have a pin image. If you are not sure about Pinterest or a pin image this post will help you understand better.
Now, these pin images are vertical. Can you imagine the reading experience if you have a vertical image after every paragraph in your post? You are bound to lose readers doing this.
So what you do instead, is post just one pinnable image and hide the rest.
This leads us to the next question.
How do these extra pin images help my blog in the first place?
Pinterest loves it when bloggers create multiple images. Pinterest is a platform that likes “fresh content”. This means new images shared on Pinterest gets circulated more. So every time you create a new pin image, even if it is for an old post you wrote 6 months ago, according to Pinterest its “fresh content”, because the image is new.
It’s easy to hide a Pinterest image in WordPress blog posts. Just add a simple code and your image will not show up in your post. But when a reader hits the “Pinterest share button” all your images will pop up for them to choose from.
Let me show you.
First, create a pin image in canva or Picmonkey and upload it into “media files” in your WordPress dashboard.
I have inserted an image below, it’s from an ebook written by Carly a mom blogger on the exact strategy she uses to get over 200,000 pageviews to her blog PINNING MANUALLY!
If you are not looking to invest in schedulers like Tailwind, but want to learn to pin manually, her ebook will teach you how to create a pinning schedule.
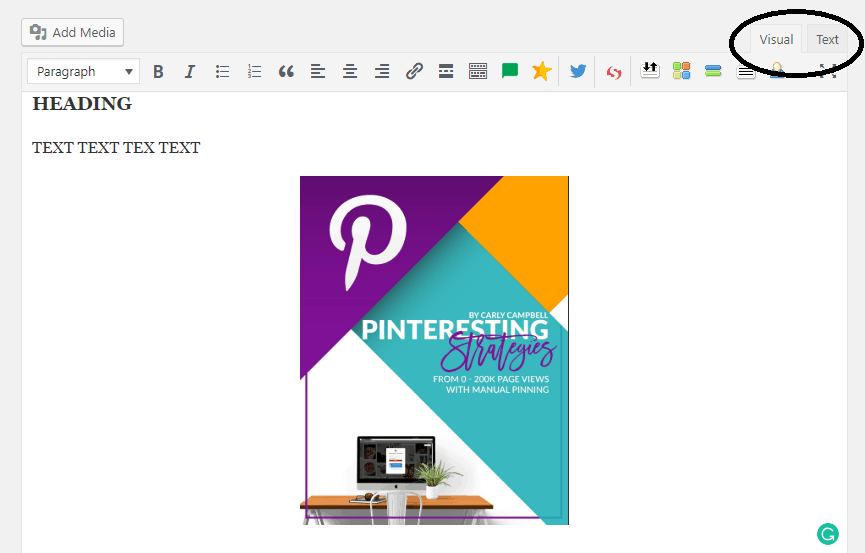
After placing the image in the body of your post, click on “text” editor, which is to the right of the visual editor (as seen in the image above)
You will see a lot of text and coding here.
This bit that you see I’ve highlighted is the IMAGE CODE. You know its an image code because it starts with a ,
<img……
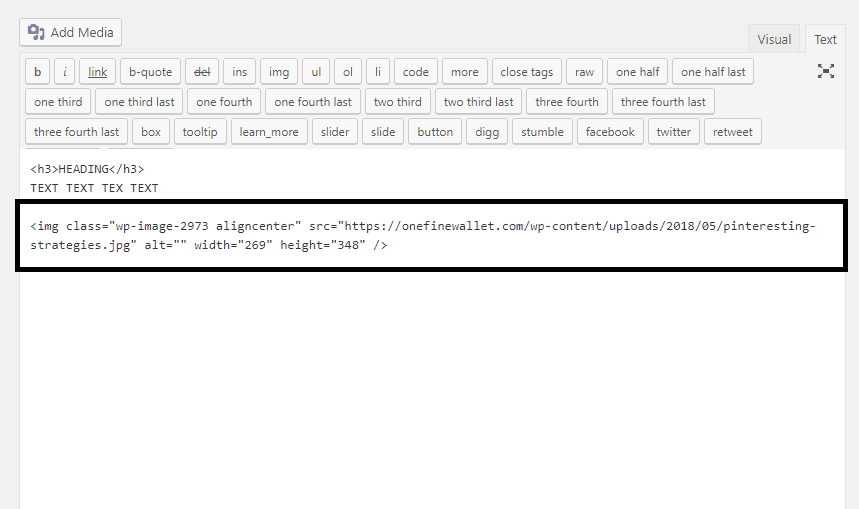
Insert these two “disappearing codes” below, (I call it disappearing, just to make it easy:)) before and after your IMAGE CODE.
This is the code you insert before- <div style=”display:none;”>
This is the code you insert after- </div>

After inserting the codes, save it and check the codes again. Sometimes with WordPress, these codes tend to get altered. So re-check and make changes to correct it if needed and save it again.
UPDATE: If you are having trouble with the image not disappearing even after you have used the code, no need to panic 🙂 These codes might automatically get altered. This is where you might see the problem. Add the code, click the save button and when you check the code,
=”display:none;”
might get changed into
=””display:none;””
Try and get rid of the extra ” that shows up. And your code should start working!
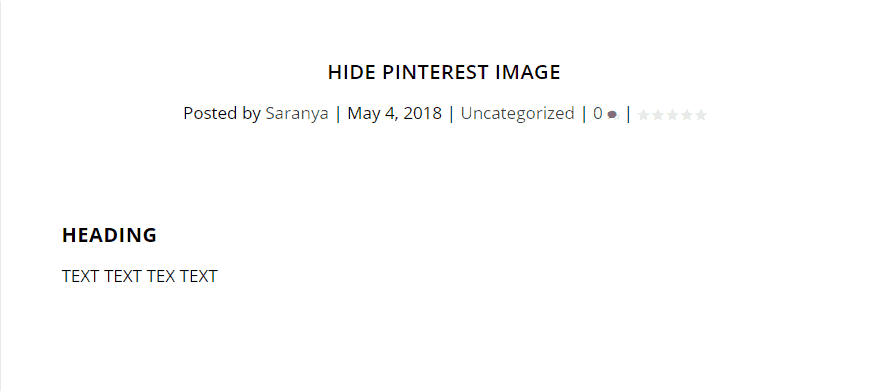
Now, if you view your post, you will notice the image has disappeared. See below.
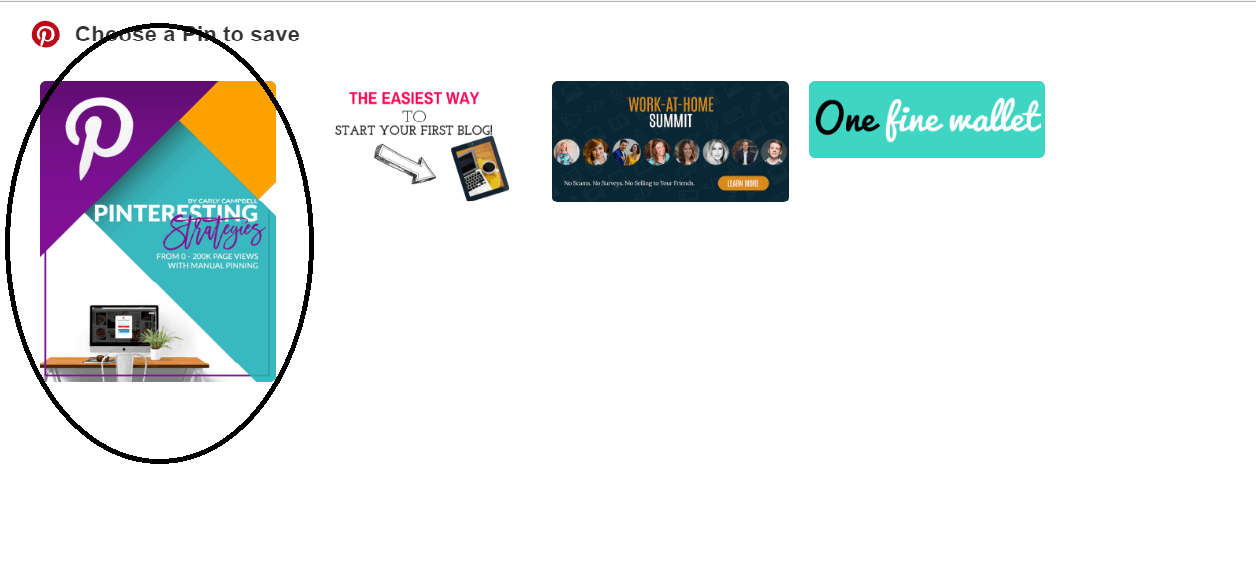
But if a reader clicks your Pinterest share button (I use social warfare for this, it’s a free plugin that looks neat), all your hidden images will show up.
Now its ready to be shared!
If you are wondering how many pinnable images to create. I do one main pinnable image that I leave visible and create an extra 3 images and hide them. You might notice one image might perform better than the other. Or a blog post didn’t perform very well due to a poorly designed image. So this technique helps with that.
Try this you might end up getting a viral post! Talking about viral, here is how I had 2 posts go viral in my first 2 months blogging. Learn how you can do it too!
Pin me for later 🙂
Does not work, tried 3 times….
I found out why it did not work, actually someone on another site already mentioned it. Sometimes you need to retype the – ” – signs. Maybe worth mentioning in the article, I think it is a common problem
Hey Edyta! Yes, these codes do get altered sometimes when you use WordPress, as mentioned in this post. But, thanks for letting me know, I’ll try and expand on this topic a little more in detail 🙂 Glad it works for you now!
I love to write, but more important I love to give help and information away. To be able to give information I need to learn it, so I scoure the internet looking for new blogs, posts, info to read and learn. Today I came across the info you provided and I read and took it in. This will go in my list of things to talk about. Thank you for sharing
Thanks Lloyd! That’s great to hear 🙂
I’ve been looking for a way to hide my pinterest images and I found this great post (wow).
Thank you for sharing!
Thanks Sukayna! I’m so glad 🙂
This looks great! Really useful tip here. I have always just been making extra images and then uploading them manually to Pinterest and split testing them. Doing this i guess helps other sharers get to pin a varied selection and not polluting the post at the same time! Great tip!
Absolutely! Gives readers to the choice to decide your winning pin! Thanks John.
Just in case anyone else is having the same issue I did with it not working – I had to stay on visual view, click the dots on the block and select to ‘edit as code’ then do it that way so that the ‘unexpected or invalid content’ thing came up – just ignore it and publish it, then it worked.